Posted on

Free Cthulhu dice bag crochet pattern

Free Cthulhu dice bag crochet pattern

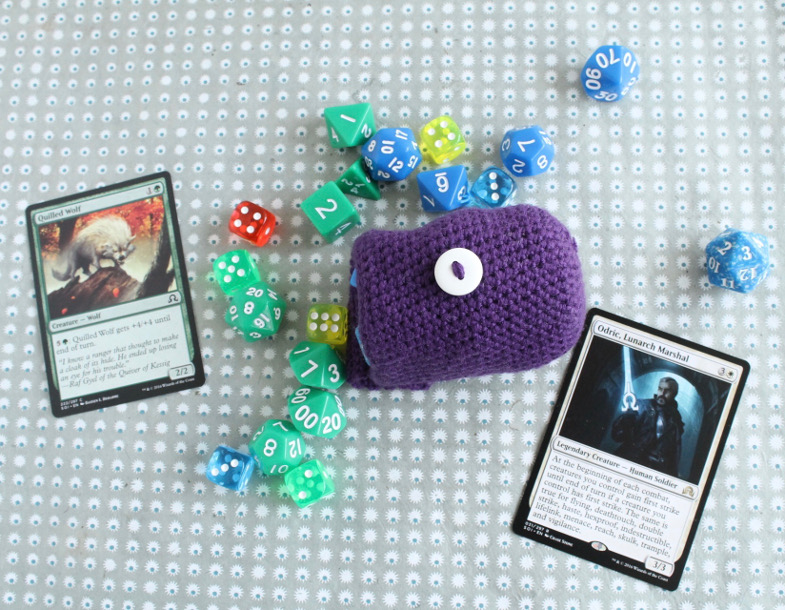
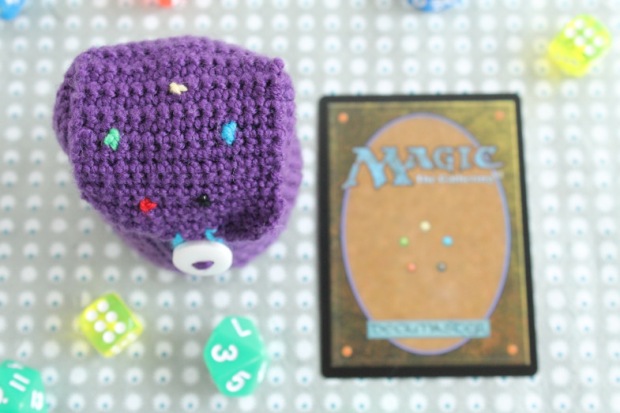
Once upon a time, I started playing Magic the Gathering. (By once upon a time, I mean approximately one year ago). We immediately became obsessed with the game, bought tons of cards, built many decks, and bought loads of dice.
I love dice. I am a die-hoarder. I love the pretty ones, the interesting ones, and the boring ones. I’m always finding more that I want. It’s a problem. With that comes the question: where the hell am I going to store these things?
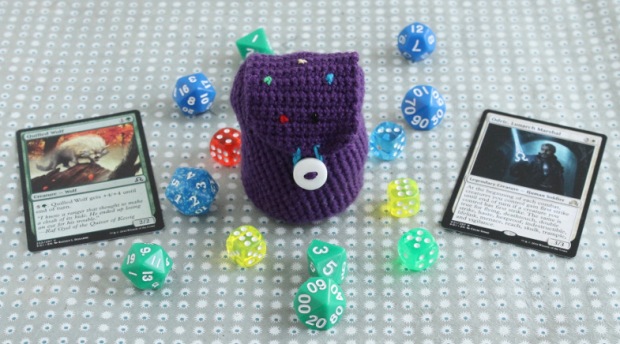
About three months ago, I made this dice bag. It’s simple, it’s cute, it’s functional. The next game night, I pulled out my dice bag, and my friend Rob’s eyes lit up. “Angie, can you make one for me?”

Free dice bag crochet pattern
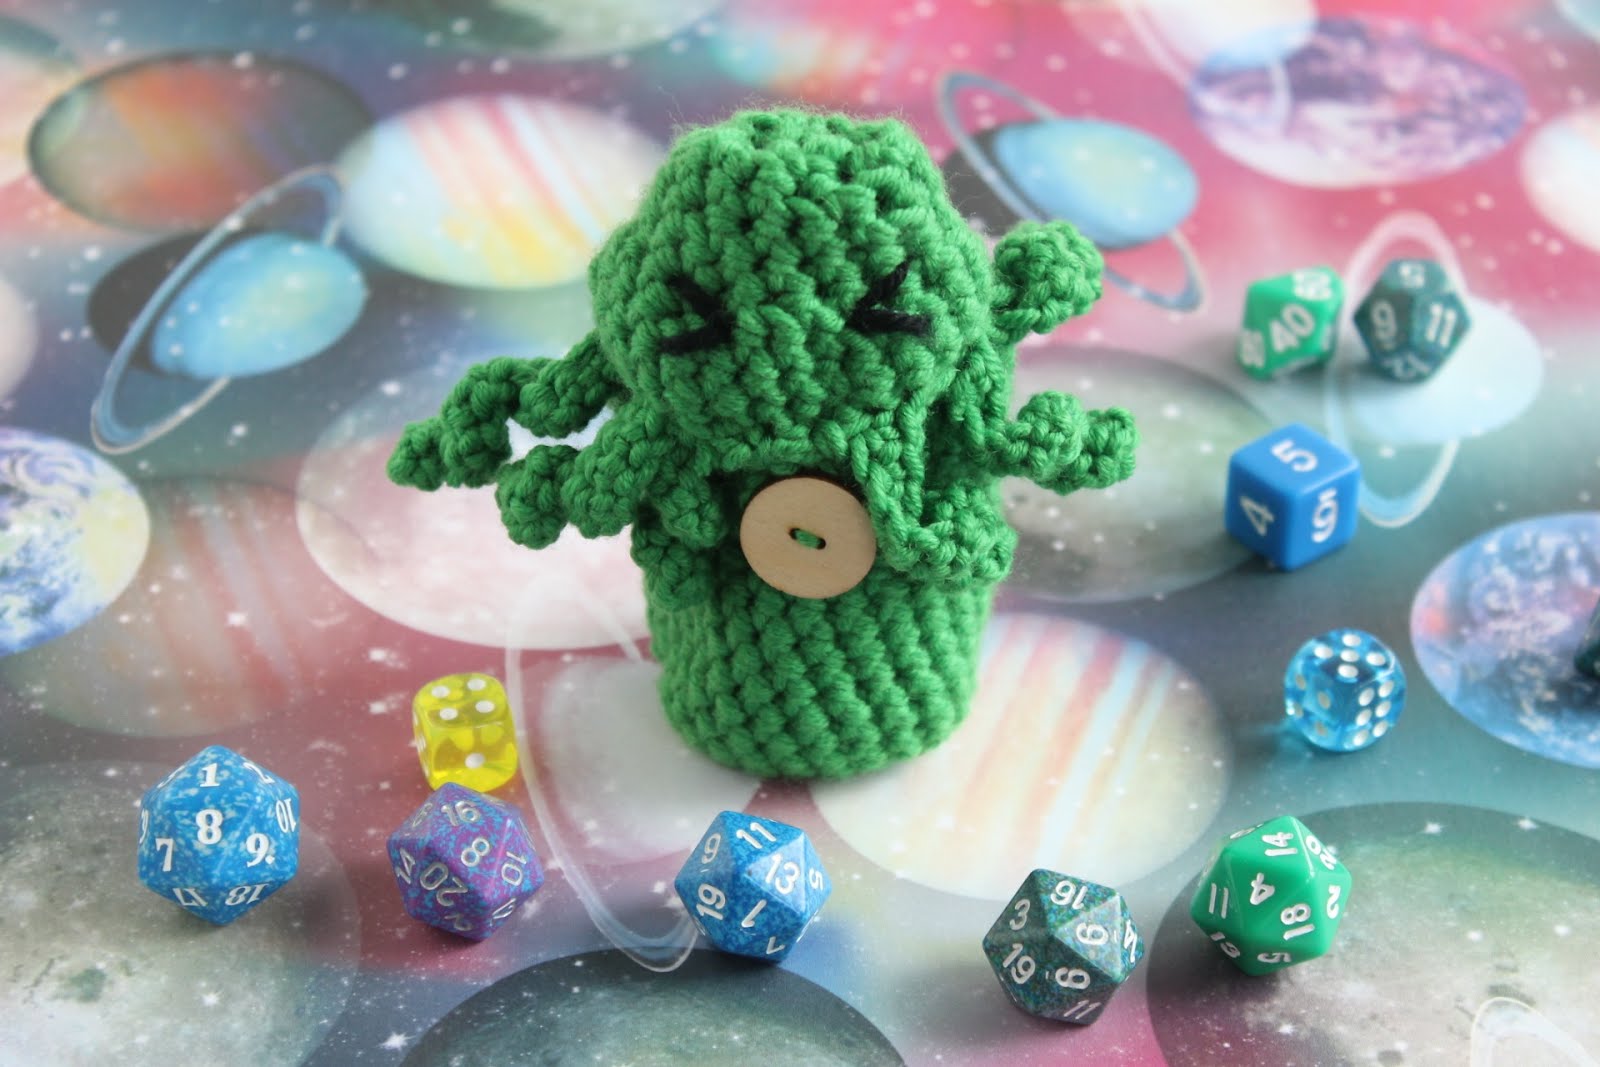
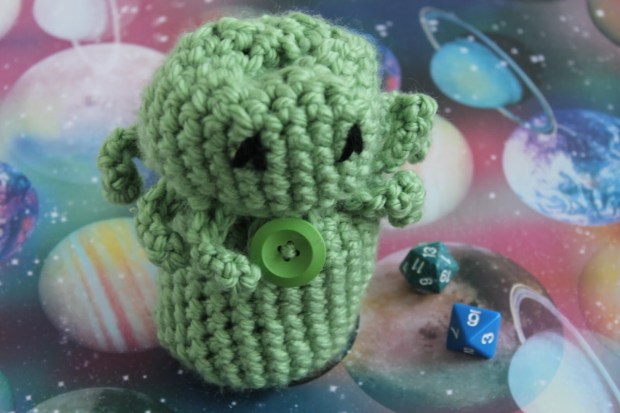
Usually I don’t make things for people on request, but Rob is an awesome human, so I agreed. When I sat down to make him his bag, though, I got smacked in the face with an IDEA. What about a CTHULHU DICE BAG?? I quickly texted Rob, asking him if he liked Cthulhu. He responded in a Lovecraftian language that implied he was into the idea.
I messed around with a few different designs, trying to find the best way to accomplish it. Here’s what I ended up with.

Materials

You can use any weight yarn with a corresponding sized hook, it will just affect how big your dice bag is. Rob’s Cthulhu was made with 4-ply yarn and a 3mm hook. I made mine with chunky weight yarn and a 4.5mm hook.

Remember: when making bags and amigurumi, it’s important to use a hook that’s smaller than you’d usually use to get that nice tight texture!

Pattern

This pattern uses US crochet terms, but just remember that every “single crochet (sc)” is a UK double crochet (dc). That’s really all you need to know for this project!

Body

Free Cthulhu dice bag crochet pattern
Working into a magic ring, 5sc.
Round 2: 2sc into every stitch (10)
Round 3: *1sc, 2sc into next stitch* Repeat ** to end (15 stitches)
Round 4: *2sc, 2sc into next stitch* Repeat ** to end (20 stitches)
Round 5: *3sc, 2sc into next stitch* Repeat ** to end (25 stitches)
Round 6: 1sc into every stitch
Repeat round 6 until the body stands about 2.5 inches tall.

Head

Free Cthulhu dice bag crochet pattern

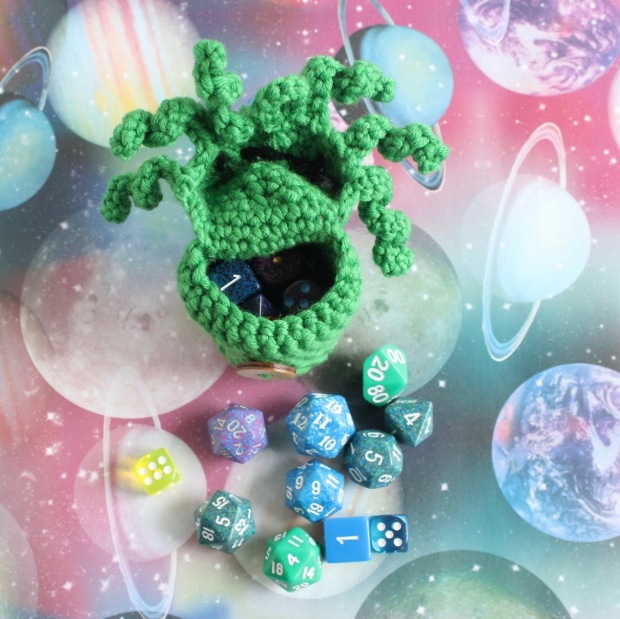
Work 7 stitches, chain 18, and join (without twisting!) to the beginning of the round. This is to create the head hinge for opening the bag. It will feel fiddly at first, but don’t worry you’re probably doing it right!
Round 2: Work one sc into every stitch around, including the 18 chains from the previous round. (25 stitches)
Repeat round 2 six times.
Round 9: *3sc, decrease* Repeat until end of round (20)
Round 10: *2sc, decrease* Repeat until end of round (15)
Round 11: *1sc, decrease* Repeat until end of round (10)
Round 12: *decrease around* (5)
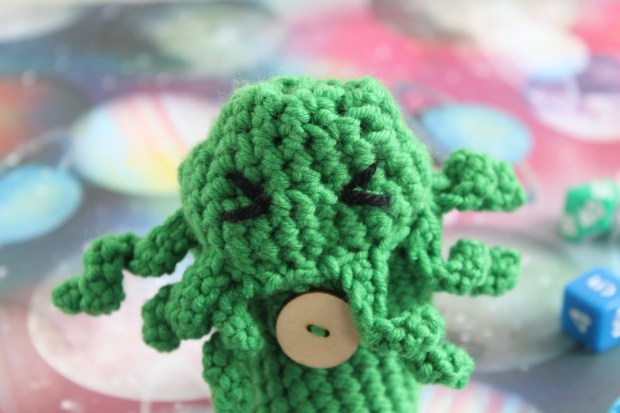
Bind off and weave in end, being careful to sew up the gap at the top of the head.

Tentacles

Free Cthulhu dice bag crochet pattern
Now for the fun part! For this part of the project, we’ll be working back into the first round of the head to create the tentacles and the loop for the button closure. You’ll be working into the 18 stitches at the bottom of the head that create the hinge for the bag, the same 18 stitches that started off as the chain in round 1 of the head.
Step one: Join yarn into the first stitch. Chain 15. Starting in the second chain from the hook, do 14 single crochets back up to the top, and sc into the same stitch as the 15 chains. Sc into the next stitch. (One tentacle made.)
Step two: Into the next stitch, Chain 10. Starting in the second chain from the hook, do 9 single crochets back up to the top, and sc into the same stitch as the 10 chains. Sc into the next stitch. (Second tentacle made.) Repeat step two.
Step three: 2sc, chain 10. Join chain into the next stitch to create the button loop. 3sc.
Step four: Repeat step two twice for two more tentacles.
Step five: Chain 15. Starting in the second chain from the hook, do 14 single crochets back up to the top, and sc into the same stitch as the 15 chains. (Final tentacle made!)
Bind off and weave in ends.
And that’s all there is to it! Like this project? Here’s an image for you to pin!

Free Cthulhu dice bag crochet pattern
Now for the boring self promotion stuff – if you follow GamerCrafting on Facebook, you’ll have access to some sweet exclusive deals on hand-dyed yarns and more cool stuff. And if you follow GamerCrafting on Bloglovin’, you’ll never miss a free pattern post.

Go forth and game!


Posted on

The Pokeball

Free Pokeball crochet pattern
Like many of you, I’ve been sucked in by the Pokemon Go craze. I’ve always loved Pokemon and had a substantial card collection when I was younger. I watched the show. I played the video games.

When they first announced Pokemon Go, I was VERY. EXCITED.

And then I was devastated.

And then, I made a (possibly bad? Nah.) purchase.
No, YOU just bought a new phone because your phone won’t run Pokemon Go. *shifty eyes*

Free pokeball crochet pattern
And so I’ve walked about 45km since this all started. I’ve hatched cool things. I’ve caught 3 billion Pidgeys and 42 trillion Rattatas. I also have a Pokestop that I can reach from the comfort of my couch. Life is good.
So, I wanted to make a Pokeball to toss at the dog, who is a brat 99.9% of the time and refuses to play fetch. Occasionally she cuddles. But it’s rare. I think she’s a cat.
//platform.twitter.com/widgets.js//platform.twitter.com/widgets.js
Bea the new puppy, however, just wanted to eat the Pokeball, so I didn’t experiment with trying to catch her with a Pokeball. I think Mollie needs a Master Ball.

Materials

-4mm (US G-6) hook
-Red, white, and black aran/worsted weight yarn
-One white button
-Stuffing (I used old cloth I had hanging around)

Pattern

Using a magic ring and red yarn, do 6sc for the first round, and tighten the magic ring.
Round 2: 2sc into every stitch (12)
Round 3: *1 sc, 2sc into the next stitch* repeat until end (18)
Round 4: *2sc, 2sc into next stitch* repeat until end (24)
Round 5: *3sc, 2sc into next stitch* repeat until end (30)
Round 6: *4sc, 2sc into next stitch* repeat until end (36)
Round 7-9: sc into every stitch. On the last stitch of round 9, change to black yarn.
Round 10: sc into every stitch. On the last stitch of the round, change to white yarn.
Round 11-13: sc into every stitch
Round 14: *4sc, decrease* repeat until end (30)
Round 15: *3sc, decrease* repeat until end (24) Start stuffing your Pokeball now!
Round 16: *2sc, decrease* repeat until end (18)
Round 17: *1sc, decrease* repeat until end (12)
Round 18: *decrease around* (6)
Sew in ends and tighten bottom hole. Sew on the button, and voila! One Pokeball!

Free pokeball crochet pattern
Love this post? P-p-p-pin it to Pinterest! A Poke-pin! (Sorry)
Free Pokeball crochet pattern
And as always, please like GamerCrafting on Facebook for more upcoming (freeeeeee!!!) crafting tutorials, and follow on bloglovin’ so you never miss a blog post. Go out there and Catch Em All!

Posted on

Free dice bag crochet pattern

Free dice bag crochet pattern

Free dice bag crochet pattern
If you’re anything like me, you have 58 dozen sets of dice for tabletop and card games. I attended the pre-release for Magic the Gathering: Shadows Over Innistrad last weekend, and realized that most of my dice ended up bouncing around the bottom of my bag. I vowed to change that in time for the arrival of my new booster packs!
 
Free dice bag crochet pattern
I’m one of those gamers who likes a little bit of everything. Consoles, PC, tabletop, I am there with bells on and ready to jam. I grew up with brothers playing Magic, but I started really getting into it about 6 months ago, when a friend sucked me into the glorious universe of card collecting. In 6 months, I have amassed 2 shoeboxes, not including the 12 boosters that arrived yesterday. Oops.
Free dice bag crochet pattern
So last weekend, I went to the pre-release tournament at the local hobby shop. I did okay: won two matches, and lost two matches (although I was very close to winning one of those). Pretty decent for a tournament noob, I think. I discovered one of my fave cards in my pre-release set: the Quilled Wolf.
Some people have disregarded the Quilled Wolf, but it won me three games, so I disagree. It’s a cheap casting cost, and can become devastating later on, especially if you manage to get the “Haunted Cloak” artifact on the board. 6/6 with trample, haste, and vigilance. Devastating. My other fave from this set so far, I got in my boosters that arrived yesterday. I love a rare, don’t you?
Free dice bag crochet pattern
Aside from looking a lot like George Clooney, this card is siiiiiick. If you build a solid deck, you could be an impenetrable mass of unholy terror – especially if you can make him hexproof and indestructible. Aw. Yes. Tempted to get a couple more of these guys to build a deck to crush all others: one card to rule them all, and in the darkness, eat them for lunch.
Anyway, back to the pattern – it’s super simple, even beginners can do it. It’s a basic basket construction, with a flap closure. It fits a lot of dice, and only uses a small amount of yarn – a stashbuster!
I used DK weight yarn and a 3.5 mm hook. You’ll also need a button, a tapestry needle, and oddments of yarn or embroidery thread to make a design.

The pattern

Make a magic ring with 10 sc (UK dc) stitches.
Round 2: 2 sc (UK dc) into each stitch.  (20 stitches)
Round 3: Sc, 2 sc into next stitch, repeat until the end (30 stitches)
Round 4: 2 sc, 2 sc into next stitch, repeat until end of round (40 stitches)
Work 1 sc in each stitch across the round until the bag measures 2.5 inches tall.
On the next round after you reach the required height, work 12 stitches, chain one, and turn. You will not be working these 12 stitches back and forth to create the flap, working 1 sc into each stitch. Continue in this manner until the flap measures about 1.75 inches, and tie off.
To make the button loop: chain 10, tie off, and sew into the flap. Sew the button on as required, and cross stitch any design over the top. Obviously, I wanted to match the back of a magic card:
Free dice bag crochet pattern
Voila! You can make one of these in an evening. Now my dice are safe and sound, bouncing around in my gaming bag along with three decks that I built this week, extra card sleeves, my camera, and some other random stuff.

If you loved this post, please pin this project, share it on social media, follow me on Facebook, and follow the GamerCrafting blog on Bloglovin’ so you never miss a free pattern post (and I have some seriously cool ones coming up!). Thanks for reading: game on!